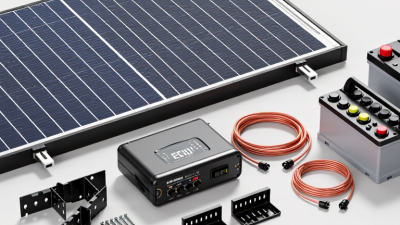
A 200 watt solar panel kit can be a practical starting point for camping, backup power, or a small off-grid setup. For 2026 buyers, the challenge is not just finding a panel with the right number on its label. The kit’s controller, cables, connectors, and battery compatibility all affect how useful it will be. Rated wattage is a test-condition figure, not a promise of constant output. Real production changes with sunlight, panel angle, temperature, and shade. Clouds matter. So does placement. Even a narrow shadow from a tree branch can reduce energy collection, depending on the panel design.
This guide looks at the features that matter before you buy, including portability, controller type, build quality, warranty terms, and what the package actually includes. A compact folding kit may suit a weekend trip, while a rigid panel can make more sense for a fixed installation. Neither is best for everyone. Check the voltage and connector details against your battery or power station, and read the manufacturer’s specifications rather than relying on product photos. One caution: a tidy wattage label can make the choice seem simpler than it is. We’ll compare practical trade-offs and explain where a 200 watt solar panel kit may fit—and where a different size or setup could be a better match.
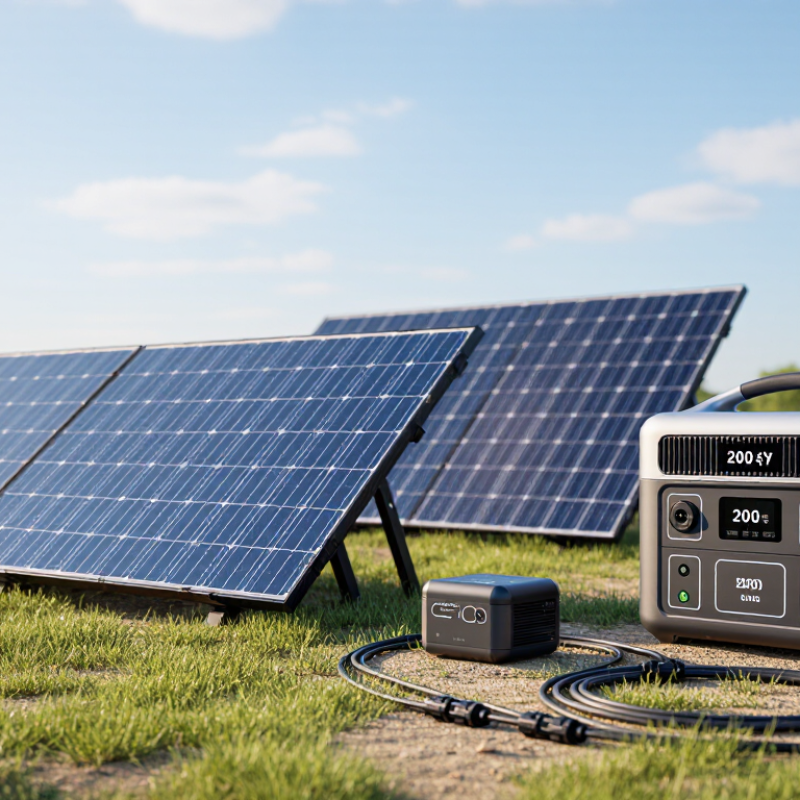
A 200-watt solar panel kit usually centers on one panel or several panels that add up to 200 watts. The package may also include a charge controller, which regulates power flowing toward a battery. Check whether it is a PWM or MPPT controller; that difference can affect charging performance. Small parts matter. Look for solar cables, connectors, and mounting brackets, since these help connect and secure the system. Their lengths and compatibility can vary.
A battery and inverter are not guaranteed to come with the kit. The battery stores energy, while an inverter converts it for devices that need household-style AC power. Some kits include neither, so read the item list carefully. Check the controller’s rated current and confirm it suits the panel setup and battery voltage. A 200-watt rating describes output under test conditions, not steady production all day. Shade, panel angle, and cloudy weather can lower real-world output. I would not size a system from the headline wattage alone. Check the included cables, too; short leads can limit where the panel can sit. A little less tidy than expected, perhaps, but useful to know before installation.
A 200-watt solar panel kit is rated under controlled test conditions, not under every rooftop or campsite sky. The rating describes peak power when sunlight, temperature, and panel angle are favorable. Real life differs. With four peak-sun-hours, a 200-watt panel could produce about 800 watt-hours before system losses; clouds, heat, and wiring reduce that estimate.
Efficiency tells you how well a panel turns sunlight into electricity for its size. A more efficient panel can be useful when roof or storage space is tight. But efficiency does not automatically mean more daily energy if two panels have the same 200-watt rating and receive equal sunlight. Compare usable area, weight, and output ratings together. Small details matter.
Shading can cut production sharply, especially when a shadow crosses part of a panel. Set the panel toward the strongest available sun, then check its output with a compatible meter or charge controller. I would not treat the label as a promise. Even careful estimates can miss local shade or seasonal changes. For a dependable comparison, look for clear test conditions and independently verified performance data, then allow room for ordinary losses.
Estimated daily energy output by panel rating under different peak-sun-hour conditions
Estimates use rated panel power × peak sun hours × a 75% system performance factor to account for typical losses. Actual output varies with location, season, shade, temperature, and equipment. Panel efficiency mainly affects the space needed to achieve a given watt rating; a 200W panel does not automatically produce more energy than another 200W panel under the same conditions.
A 200-watt panel kit needs a battery and controller that fit its actual electrical limits, not just its headline wattage. On a 12-volt battery system, 200 watts represents roughly 14–17 amps before conversion losses. A 20-amp controller is often a practical starting point, but check its maximum PV input voltage and current against the panel’s specifications. The battery’s chemistry also matters: its charging-voltage profile must match the controller’s settings. Easy to overlook.
Size battery capacity around your daily energy use and desired backup time. For example, a small fridge and lights need a different reserve than occasional phone charging. NREL’s PVWatts documentation uses a 14% default system-loss estimate, a useful reminder that rated panel output rarely reaches the battery unchanged. A 2019 DOE/PNNL cost-characterization report models lithium-ion round-trip efficiency at about 85%; actual performance varies by equipment and conditions. I still see buyers sizing only for sunny afternoons. That shortcut can leave a battery short after cloudy days. Check the battery maker’s usable-capacity guidance, then leave room for seasonal variation and aging.
| System Setup | Battery Capacity and Typical Usable Energy | Charge Controller Recommendation | Estimated Solar Energy per Day | Practical Fit | Matching Notes |
|---|---|---|---|---|---|
| 200 W panel + 12 V lead-acid battery | 12 V, 100 Ah; about 1.2 kWh nominal. Limiting routine discharge to roughly 50% provides about 0.6 kWh of usable energy. | MPPT controller rated for at least 20 A output at 12 V. | About 0.6 kWh under the assumptions below. | Small daily loads such as LED lighting, device charging, and limited use of a small 12 V refrigerator. | A 200 W array can produce close to 14 A at typical 12 V battery charging voltages, so a 20 A controller provides operating headroom. Avoid repeatedly discharging lead-acid batteries deeply. |
| 200 W panel + 12 V LiFePO₄ battery | 12.8 V, 100 Ah; about 1.28 kWh nominal. Actual usable energy depends on the battery’s BMS settings and manufacturer limits. | MPPT controller rated for at least 20 A output at 12 V, with a charging profile compatible with LiFePO₄. | About 0.6 kWh under the assumptions below. | Moderate off-grid use where lighter weight and greater usable capacity than a similarly sized lead-acid battery are useful. | Check that the controller’s charging-voltage settings suit the battery. Confirm that the battery BMS permits the controller’s maximum charge current. |
| 200 W panel + 12 V LiFePO₄ battery | 12.8 V, 200 Ah; about 2.56 kWh nominal. Usable energy varies with the battery’s specified operating limits. | MPPT controller rated for at least 20 A output at 12 V; verify the battery’s permitted charge current. | About 0.6 kWh under the assumptions below. | Longer backup runtime or higher-capacity storage, provided daily energy use is modest. | The larger battery stores more energy but does not increase panel output. Recharging a substantially depleted battery may take multiple sunny days with a single 200 W panel. |
| 200 W panel + 24 V lead-acid battery | 24 V, 100 Ah; about 2.4 kWh nominal. At roughly 50% routine depth of discharge, about 1.2 kWh is available. | MPPT controller rated for at least 10 A output at 24 V. | About 0.6 kWh under the assumptions below. | Systems using 24 V loads or an inverter designed for a 24 V battery bank. | At 24 V charging voltage, 200 W corresponds to around 7 A before system losses, so a 10 A controller is a reasonable minimum. Use a controller that supports the chosen battery chemistry. |
| 200 W panel + 24 V LiFePO₄ battery | 25.6 V, 100 Ah; about 2.56 kWh nominal. Usable energy depends on the battery’s BMS and specified limits. | MPPT controller rated for at least 10 A output at 24 V, with a compatible LiFePO₄ charging profile. | About 0.6 kWh under the assumptions below. | 24 V installations where reduced current on the battery side is desirable compared with an equivalent 12 V system. | Confirm the controller supports the battery’s charging voltage and that the battery BMS allows the charging current. The panel’s voltage must also suit the controller’s input range. |
Estimate and compatibility notes: The daily-energy estimate assumes four peak sun hours and an overall system efficiency of 75%: 200 W × 4 hours × 0.75 ≈ 600 Wh per day. Actual output varies with location, season, shading, panel angle, temperature, and wiring. Before buying, check the panel’s open-circuit voltage (Voc), including cold-weather conditions, against the controller’s maximum PV input voltage; also check the controller’s supported battery voltage and chemistry. A 20 A or 10 A rating refers to controller output current at the stated battery voltage.
A 200-watt kit should be compared by its components and intended use, not its headline rating alone. The panel’s 200 watts describes output under standardized test conditions. Actual production changes with shade, panel angle, temperature, and available daylight. Small shadows matter. Check whether the kit includes a charge controller, cables, mounting hardware, and a battery, or only the panel. Missing parts can change the real cost.
For weekend camping, compare folded size, weight, setup time, and connector type. A compact panel may be easier to position beside a tent than to carry on a roof. For a shed or small off-grid setup, check controller compatibility with the battery’s voltage and chemistry. Also consider cable length; a short cable may force awkward panel placement. For emergency charging, confirm what devices can connect and whether an inverter is included. A 200-watt panel does not guarantee 200 watts of usable power at an outlet.
Estimate daily energy using local sunlight hours, then allow for conversion losses and cloudy periods. A rough estimate can still miss. I would avoid choosing by price per watt alone: durable supports, clear specifications, and a suitable controller may matter more for regular use. Compare warranty terms and check that stated limits match your battery and planned setup.
A 200-watt solar kit works best when the panel has steady sunlight and a stable, well-ventilated position. Set it facing the strongest midday sun, and secure it against wind before connecting the cables. Even a narrow strip of shade can reduce output, so check for branches, roof edges, and nearby equipment. Follow the kit instructions for connecting the charge controller and battery; confirm their voltage compatibility rather than guessing. Keep connections dry and protected from accidental pulls. No shortcuts here.
After setup, compare the controller’s daily energy readings under similar weather conditions. A cloudy afternoon can make a healthy system look weak, while a full battery may limit charging and confuse the picture. Record the date, sunlight, and reading in a notebook; a few weeks of notes reveal patterns better than one glance at an app. Clean dust with a soft cloth and water when the panel is cool. Avoid abrasive cleaners. Inspect cables and mounting points monthly for loose fittings, fraying, or corrosion, and follow the manual before disconnecting anything. A neat display is not proof that every connection is sound. If wiring is damaged or the system behaves unpredictably, stop using it and ask a qualified technician to inspect it.