Choosing a solar panel inverter kit is not simply a wattage comparison. It is a practical decision about energy flow, safety, expansion, and daily reliability. The inverter converts solar electricity into usable household power. A poor match can cause clipping, shutdowns, or disappointing production on bright afternoons. That matters.
A dependable choice begins with the panel array, battery plans, roof conditions, and local grid requirements. Experienced installers check voltage ranges, maximum current, MPPT inputs, efficiency, monitoring, and enclosure ratings. They also compare continuous output with startup surges from pumps, refrigerators, or workshop tools. For example, a 5-kilowatt array may not suit a 3-kilowatt inverter when household demand rises. Numbers need context. Manufacturer datasheets and recognized certification records deserve more trust than marketplace slogans. Still, specifications can be misunderstood, especially when peak power is presented as continuous capacity. That distinction is easy to miss.
This guide explains how to compare string, microinverter, and hybrid designs without chasing features you may never use. It considers shading, roof orientation, battery compatibility, backup circuits, installation space, and long-term service. A shaded chimney may make module-level optimization more valuable than a cheaper central unit. A rural property may need different backup planning than a city apartment. Real performance depends on design quality and installation workmanship. Inevitably, no kit is perfect for every roof. Reviewing assumptions before purchase can prevent expensive changes later. The right solar panel inverter kit should fit the system, the building, and the owner’s realistic energy habits.
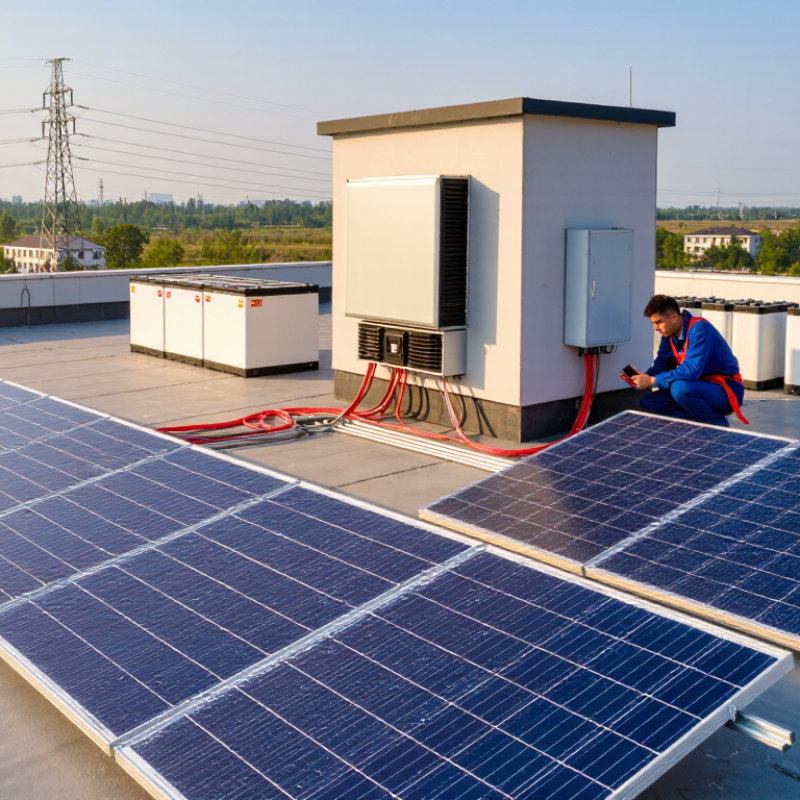
A solar panel inverter kit converts the panels’ direct current into usable alternating current for household appliances. It may include an inverter, cables, monitoring equipment, and protective devices. Some kits also support batteries, allowing stored energy to power lights after sunset. That detail matters.
Choosing the right kit starts with system size. Check the panels’ total wattage, expected peak output, and the inverter’s continuous rating. A very small inverter may waste production during bright midday hours. An oversized unit can cost more and operate inefficiently under light loads. Match the inverter’s input voltage range with the panel array, and confirm battery compatibility when storage is planned. MPPT technology can improve energy harvest when sunlight changes across the day.
Safety deserves careful attention. Look for recognized electrical certifications, built-in surge protection, grounding provisions, and clear installation instructions. A qualified installer should verify cable size, ventilation, shutdown access, and local electrical requirements. In practical inspections, loose connectors and poorly placed equipment cause more concern than impressive efficiency numbers. Small errors grow.
Monitoring software can show daily generation, fault codes, and unusual output drops. It is useful, but not flawless; wireless readings may lag or disappear. I once treated a low reading as a panel fault, only to find temporary shading from new construction. That experience changed my checking routine: inspect the site, review the data, and test connections before replacing equipment. A kit should fit the roof, the electrical system, and the household’s real energy habits.
How to Choose a Solar Panel Inverter Kit?
How to Match Inverter Capacity with Your Solar Panel System
Matching inverter capacity starts with the panels’ total DC rating, not your household’s largest appliance. Add the panel wattages to find the array size. Then compare it with the inverter’s continuous AC output. A 6 kW panel array may work with a 5 kW inverter in some climates, creating limited midday clipping. This can reduce equipment cost, but excessive clipping wastes available generation.
Check the inverter’s maximum DC input, operating voltage range, and MPPT current limit. The panel string must remain within these limits during both hot afternoons and cold mornings. Cold weather can raise voltage significantly. Shade may also push several strings into uneven production. I usually check the lowest expected temperature before approving a design. A neat calculation can still be wrong.
Household demand matters, especially with pumps, compressors, and workshop tools. Their starting surge may exceed their running wattage. A system with batteries needs separate checks for inverter output, charge current, and backup loads. Local electrical rules may also require specific isolation, protection, and connection methods. Do not size only for a perfect sunny day. Clouds, dust, wiring losses, and future panel additions deserve attention. I still recheck the design after installation because real roofs rarely match the drawing.
Choosing a solar inverter kit starts with your energy pattern, not the panel count. A string inverter suits a clear, unshaded roof with panels facing similar directions. It keeps wiring simple and usually costs less. However, one shaded panel can reduce the output of the entire string.
Microinverters work well on roofs with partial shade, multiple angles, or limited space. Each panel operates independently, which makes performance easier to monitor.
A hybrid inverter fits homes planning to add batteries or use backup power. For cabins or remote sites, an off-grid inverter needs careful battery sizing and reliable load management. I have seen homeowners choose a larger inverter than necessary. That decision can increase cost without improving daily performance.
Tips: Check your highest daytime load, roof shading, battery plans, and local temperature range. Confirm the inverter’s voltage and current limits match the panel layout. Leave ventilation space around the unit. A qualified installer should verify grounding, protection devices, and local electrical requirements. Do not rely only on an online calculator. Real roofs are rarely perfect. Recheck the design after measuring shade in different seasons.
Choosing a solar panel inverter kit requires more than reading its highest efficiency number. Peak efficiency describes ideal conditions, not a hot roof at noon. Check the weighted efficiency rating, which better reflects changing sunlight during daily operation. A difference of two percent can affect yearly energy production. It matters more in cloudy regions or on roofs with partial shade.
Safety features deserve equal attention. Look for anti-islanding protection, over-temperature control, surge protection, and clear fault indicators. These functions help disconnect the system during grid problems or internal faults. I once focused too heavily on efficiency and overlooked ventilation space around the inverter. That mistake could have shortened its service life. Read the installation guide carefully. A quiet fan is useful, but airflow remains essential.
Compatibility prevents expensive surprises. Match the inverter’s input voltage range with the panel string voltage, including cold-weather increases. Confirm the maximum current, connector type, battery voltage, and grid requirements. For a small home system, monitoring through a local display or secure application can reveal declining output early. Do not assume every kit supports future battery storage. Ask for written confirmation. Installer experience also matters, especially when roof orientation, shade, and cable distance complicate the design. I still recheck these figures because simple spreadsheet errors happen easily.
Before buying an inverter kit, match its electrical limits to your solar array. The IEA PVPS Trends in Photovoltaic Applications 2024 report estimates that global PV capacity surpassed 1.6 terawatts. That scale makes careful equipment matching essential. Check the array’s maximum open-circuit voltage, operating current, and total wattage. The inverter’s MPPT range must include your panel voltage during cold mornings. Heat can reduce output, too. Do not size from the panel label alone.
Battery plans require another inspection. Confirm battery chemistry, voltage, charging limits, and communication compatibility. Check whether the kit supports backup loads or only grid-connected operation. Read the continuous AC rating, not just the short peak rating. A refrigerator may start with several times its running power. Small details matter. I would also review efficiency across different loads, because laboratory peak efficiency may not reflect evening household use.
Installation conditions deserve equal attention. Look for the required IEC 62109 safety certification and local electrical approval. Confirm the enclosure’s IP rating, ventilation needs, noise level, and operating temperature. The IRENA Renewable Power Generation Costs report shows solar PV costs fell sharply through 2023, but cheaper equipment is not automatically better value. Leave space for service access. Label every cable. Photograph the final connections. Even experienced installers can overlook shading, loose terminals, or an incorrect monitoring setting, so commissioning tests should verify voltage, polarity, insulation, and shutdown behavior.