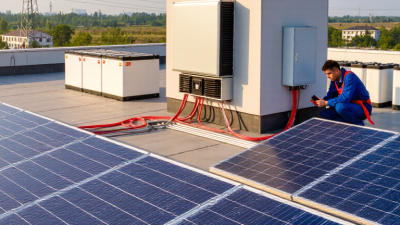
Solar power has moved from a niche technology into a mainstream energy choice. The International Energy Agency’s Renewables 2024 report states that solar photovoltaic systems represented about three-quarters of global renewable capacity additions in 2023. That growth creates opportunity, but it also creates confusion. A cheaper system is not automatically the better system.
Choosing a solar panel kit requires more than comparing panel wattage. You should examine expected energy use, roof direction, shading, inverter capacity, battery compatibility, installation requirements, and warranty terms. The IEA Photovoltaic Power Systems Programme’s Trends in Photovoltaic Applications 2024 report highlights the continuing expansion and diversification of global PV markets. Products now serve balconies, recreational vehicles, remote cabins, and full residential systems. Each application needs different equipment.
Details matter.
For example, a 400-watt panel may perform poorly under morning shade from a nearby chimney. A compact kit may also lack enough storage for a refrigerator, medical device, or well pump overnight. The U.S. National Renewable Energy Laboratory’s PVWatts guidance demonstrates why local weather, orientation, tilt, and system losses affect real production. These factors are easy to overlook. I have seen buyers focus on panel size while ignoring cable length and inverter limits. That is a costly weakness.
This guide explains seven practical tips for selecting the best solar panel kit. It emphasizes verified specifications, reputable certifications, realistic output estimates, and professional installation advice. No kit is perfect. Careful comparison is still the safest starting point.
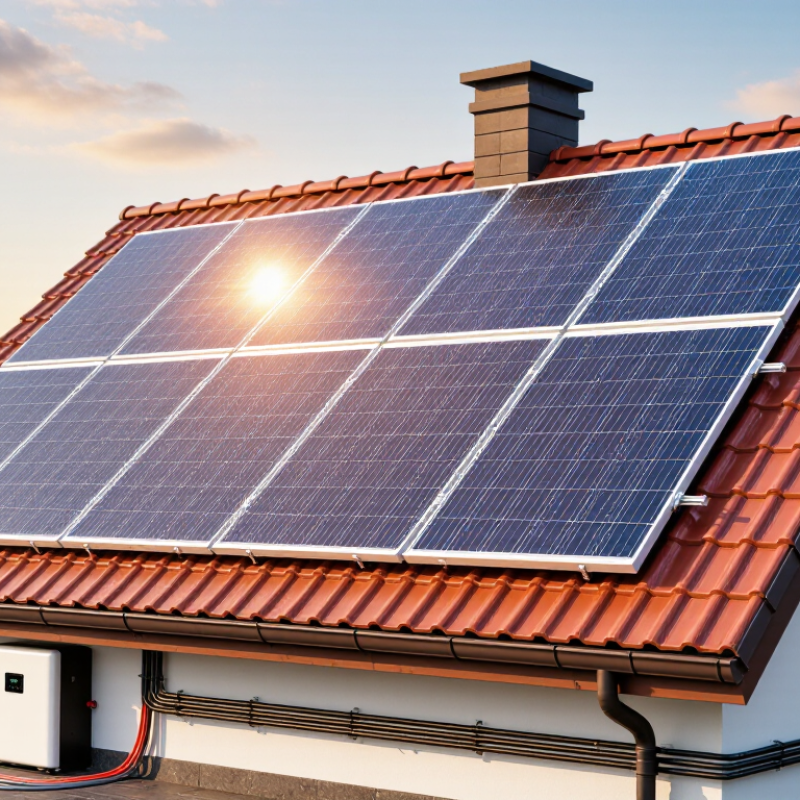
Your solar kit should match your actual electricity use, not an impressive roof photo. Start with twelve months of utility bills and identify seasonal peaks. The U.S. Energy Information Administration reported average residential electricity use of about 886 kilowatt-hours monthly in 2023. Your household may differ sharply.
Tip 1: List major loads, such as cooling, heating, pumps, and electric vehicles.
Tip 2: Decide whether your goal is lower bills, backup power, or off-grid operation.
Tip 3: Separate daily energy needs from short startup surges. A refrigerator may use modest energy but require higher starting power.
Tip 4: Choose battery capacity only after measuring nighttime demand. Oversizing a battery can quietly inflate project costs.
Installation conditions matter. The International Renewable Energy Agency reported 473 gigawatts of renewable capacity added globally in 2023, with solar providing most of that growth. Scale is rising, but every roof remains different. Check shading at 9 a.m., noon, and late afternoon. Measure roof space, pitch, orientation, and cable routes. Also confirm local permits and structural requirements.
Tip 5: Compare expected annual production, not panel wattage alone.
Tip 6: Leave space around vents and roof edges.
Tip 7: Request an estimate showing losses from shade, temperature, wiring, and inverter conversion.
I would not trust a perfect production promise. Weather changes, and my first estimate could be wrong. Build in a modest margin, then review the design with a qualified installer before purchasing.
Tip 1: Compare kit types before comparing prices.
A grid-tied kit suits homes with reliable utility service and regular daytime usage. An off-grid kit needs batteries, a charge controller, and careful load planning. Hybrid kits provide more flexibility, but their controls can add cost and maintenance. Check every included component, not only the panel count.
Tip 2: Read efficiency figures carefully.
Higher efficiency can help when roof space is limited. However, efficiency alone does not guarantee better yearly production. Shade, roof direction, temperature, and inverter losses also matter. Ask for the panel’s temperature coefficient and tested power rating. I once trusted a simple efficiency chart too quickly. It ignored afternoon shade from a nearby tree.
Tip 3: Match system capacity to measured electricity use.
Review twelve months of utility bills, then identify large loads such as pumps, heaters, and refrigeration. A small kit may cover essential daytime devices. A larger system may need stronger wiring, mounting, and permitting support.
Do not guess. Measure.
A qualified installer should verify roof structure, local electrical requirements, and battery ventilation. Reliable guidance includes clear warranties, installation instructions, safety certifications, and realistic production estimates. Remember that advertised capacity describes peak conditions, not every cloudy afternoon. A neat spreadsheet can still mislead. Leave room for seasonal changes, future appliances, and your own changing habits.
7 Tips for Choosing the Best Solar Panel Kit
Tip 1: Measure your roof before comparing panel prices. Note usable length, width, shade, vents, and roof access. A simple sketch prevents expensive guesses. Tip 2: Check roof direction and pitch. A south-facing roof often performs well, but local sunlight and seasonal shadows matter more than assumptions. Tip 3: Confirm the roof can support the kit’s weight, rails, and wind forces. An older roof may need inspection before installation.
Tip 4: Match the battery to your daily energy use. Review its usable capacity, voltage, chemistry, and recommended charging limits. A battery that looks large may still provide little power during cloudy evenings. Tip 5: Check inverter compatibility carefully. The inverter must accept the panels’ voltage and current, while supporting the battery’s charging requirements. Never rely on similar-looking connectors. Tip 6: Compare the kit’s peak output with your real household load. A kettle, pump, or refrigerator can briefly demand more power than expected. Your first estimate may be wrong, so track electricity use for several days. Tip 7: Read installation instructions and safety certifications before purchase. Local electrical rules may require qualified inspection or professional connection.
Leave space around panels for maintenance. Also, check whether future battery expansion is possible. A lower-priced kit can become costly when its inverter cannot grow with your system. I have seen compatibility treated as a minor detail; it is usually the detail that decides whether the system works smoothly.
Choosing the Best Solar Panel Kit: Durability, Certifications, Warranty, and Support
Choosing a solar panel kit means judging its future behavior, not just its advertised wattage. NREL’s analytical review found a median photovoltaic degradation rate near 0.5% annually. That sounds small. Over 25 years, output can still fall noticeably. Look for independent testing against IEC 61215 and IEC 61730, covering performance, safety, and environmental stress. Inspect frame joints, cable seals, and connector fit, especially if the kit will face salt air or snow. A datasheet cannot reveal every weak seal.
The IEA PVPS Trends 2024 report recorded about 456 GW of new solar capacity in 2023. Global solar capacity exceeded 1.6 TW by year-end. As deployment accelerates, certification paperwork deserves careful checking. Confirm the certificate applies to the exact module and inverter models, not merely the product family. Read warranty exclusions for shading, installation errors, transport damage, and annual production thresholds. Support matters after the box arrives. Ask whether troubleshooting is handled locally, how quickly replacement parts ship, and who pays return freight. I sometimes overvalue long warranties. A responsive support team may protect more energy than an impressive promise. Still, response times are hard to verify before purchase; request written service procedures and test them with a real question.
| Tip | Evaluation Dimension | Recommended Standard or Target | What to Check Before Purchase | Potential Red Flags |
|---|---|---|---|---|
| 1 | Panel Durability | Choose panels with published mechanical-load ratings, corrosion testing, and a design life of approximately 25–30 years. | Review the technical datasheet for front-load and rear-load ratings, temperature range, hail testing, and resistance to moisture, salt mist, and ammonia where relevant. | Avoid products with no detailed datasheet, unclear test conditions, or unsupported claims such as “all-weather” without test results. |
| 2 | Electrical Safety Certifications | The panel should be certified to applicable standards such as IEC 61215 for design qualification and IEC 61730 for photovoltaic module safety. Products sold in North America commonly require the applicable UL 61730 certification. | Look for certification marks and a certificate number that can be verified through the relevant testing or certification organization. Confirm that the certificate applies to the exact model and configuration. | A generic “CE” statement alone does not replace photovoltaic safety and performance certification. Be cautious when certificates cannot be independently verified. |
| 3 | Power and System Sizing | Select a kit based on daily energy demand, available sunlight, roof or ground area, and local electrical requirements. Include an appropriate design margin rather than matching panel wattage to consumption alone. | Compare the module wattage, voltage at maximum power, current at maximum power, inverter capacity, battery voltage, charge-controller rating, and estimated daily energy yield. | Do not rely only on the advertised peak wattage. Shading, temperature, orientation, wiring losses, inverter efficiency, and seasonal sunlight can reduce actual output. |
| 4 | Product Warranty | Market warranties commonly provide about 10–15 years for product workmanship and approximately 25–30 years for power performance, although terms vary by component and supplier. | Read the complete warranty document, including degradation limits, claim procedures, labor coverage, transportation costs, exclusions, transfer rules, and the legal entity responsible for the warranty. | A long performance warranty may have limited practical value if it excludes labor, shipping, installation defects, or claims outside a narrow notice period. |
| 5 | Inverter and Battery Protection | The inverter and battery system should include appropriate overcurrent, overvoltage, short-circuit, over-temperature, and reverse-polarity protection. Battery systems should also include a suitable battery management system when required by the battery chemistry. | Check operating-temperature limits, enclosure rating, maximum continuous power, surge capacity, shutdown behavior, grounding requirements, and compatibility between the panels, inverter, controller, and battery. | Avoid kits that combine components without published compatibility data, protection specifications, or clear installation instructions. |
| 6 | Installation and Maintenance | The kit should include a complete bill of materials, compatible mounting hardware, cable specifications, connectors, protection devices, and an installation manual suited to the intended mounting method. | Confirm roof or ground-mount compatibility, cable lengths, connector type, grounding method, local permit requirements, inspection rules, and whether a licensed electrician is required. | Missing hardware, mixed connector types, undersized cables, unclear grounding instructions, and installation diagrams that omit protection devices can create safety and reliability problems. |
| 7 | Technical Support and Service | Prefer suppliers that publish contact channels, response expectations, troubleshooting procedures, replacement policies, spare-part availability, and documentation in the installation region. | Ask whether support covers system design, commissioning, warranty claims, firmware updates, replacement parts, and remote monitoring. Confirm the availability of support after the sale. | Be cautious if support is limited to an automated form, technical documents are unavailable, or no clear process exists for defective components and warranty replacement. |
Note: Certification requirements, electrical codes, warranty terms, and installation rules vary by country and system type. Always verify the latest local requirements before purchase or installation.
Choosing a solar panel kit requires more than comparing wattage. Calculate the full cost, expected savings, and replacement risks before buying.
Tip 1: Measure your roof’s usable area and daily sunlight. A shaded roof can reduce output sharply.
Tip 2: Estimate annual production with a trusted solar calculator, then compare it with your electricity bills. The U.S. Energy Information Administration reported an average residential electricity price of about 16.5 cents per kilowatt-hour in 2024.
Tip 3: Add panels, an inverter, mounting hardware, wiring, permits, labor, and possible battery costs. My first estimate ignored installation materials. It was too optimistic.
Tip 4: Test different electricity-price assumptions. A five percent annual increase may look attractive, but real prices can move unpredictably.
Tip 5: Include performance decline. NREL research commonly reports panel degradation near 0.5% annually, although individual products vary.
Tip 6: Compare warranties with replacement costs, especially for inverters and batteries. A cheaper kit may become expensive after one major failure.
Tip 7: Calculate payback and long-term value separately. Lazard’s 2024 Levelized Cost of Energy analysis placed utility-scale solar near 2.9 to 9.2 cents per kilowatt-hour, but home economics depend on location, financing, and system size.
Leave room for doubt. A conservative estimate is usually more useful than a perfect-looking spreadsheet.